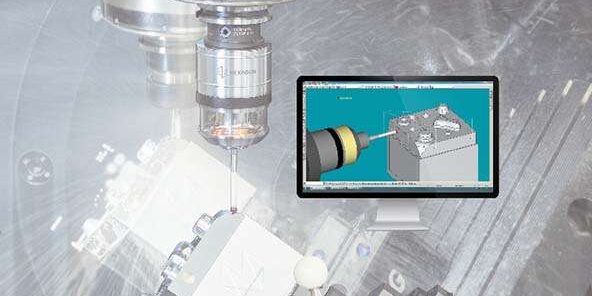
The reliable solution for your success is 3D Form Inspect. In modern production facilities, the measurement of machine tools and quality control are becoming increasingly important. This software allows for quick and easy measurement and logging of essential geometries and shapes on all sides and along all axes directly on the machine tool. This not only enhances quality but also saves time and improves safety.
With 3D Form Inspect, you can efficiently measure and log ruled geometries and forms from all angles directly on the machine tool. This is particularly beneficial for the aerospace and mold and die industries. Overall, 3D Form Inspect enhances manufacturing safety, improves quality, and saves time.
User-Friendly Features
The measurement capabilities are designed for machine operators, featuring a user-friendly interface that simplifies operation.
– Safety is ensured with touch probe collision detection.
– Measurement plans and results are sent automatically.
Comprehensive Compatibility
The system is compatible with nearly all CNC controls and includes extensive import filters for CAD surface data. You can instantly rework without the need for a new setup, preventing machine downtime caused by incomplete data or measurement results.
Thorough Quality Documentation
Measurement and results are obtained in a fully automated cycle, allowing for effective quality documentation. This approach reduces costs while enhancing your competitiveness.
– Effectively define the workpiece zero point in relation to the workpiece contour.
– Results are evaluated immediately after machining, eliminating the need to transfer data to the measuring device.
Features & Benefits
Extensions, Extra Modules, and Options
Typical Operations
– Examine freeform surfaces.
– Verify ruled geometries such as drill holes, cylinders, spheres, etc.
– Calculate the angled positions of ruled geometries and surfaces.
– Assess tolerances for shape and position.
– Cross-styles are accepted.
– Use a patented calibration technique for optimal outcomes.
Additional Features:
– Compensate for measurement inaccuracies that occur at the spindle interface (SK/BAT).
– Automatically identify and adjust for kinematic changes during measurement.
– Determine thermal displacements in the working area and incorporate them into assessments.
– Mitigate the impact of axis lag errors in measurement processes.
– Utilize vector calibration to eliminate pre-travel variance in probing systems.
– Full support for optional fourth and fifth axes.
