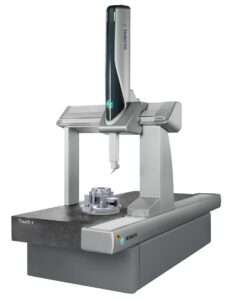
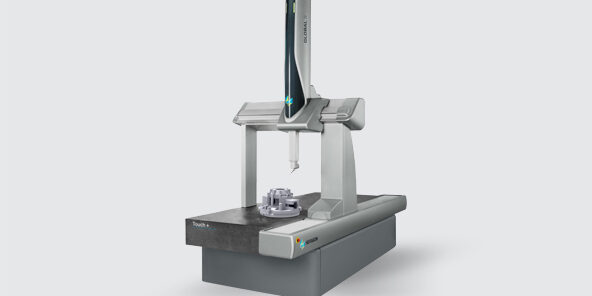
The GLOBAL Touch+ model offers exceptional tactile single-point measuring performance on prismatic parts by utilizing a very precise and adaptable 6-way touch-trigger probe with a motorized indexing probe head to flexibly move the probe during measurement.
Even for the most complex 3D part geometries, optimal feature accessibility and minimal stylus changes are ensured. Further simplifying measuring cycles is the ability to quickly and reliably switch out probe modules with various trigger forces and styli configurations without the need for recalibration thanks to a multi-port module changeover rack.

Options Based on Application Requirements
PC-DMIS CAD++
PC-DMIS CAD++ is designed for measuring intricate components. It incorporates all of CAD’s features while also allowing the measurement of complex, curved surfaces, such as those found in thin-walled sheet metal, plastic, blades, dies, and molds. The CAD++ software features methods for managing large volumes of data and is compatible with a wide range of scanning equipment and applications. It seamlessly integrates with CAD, enabling users to compare measurement results directly against models with exceptional speed and precision. Although it offers a multitude of features, it remains user-friendly.
Greater Temperature Range
The GLOBAL Touch+ model, with the XT (extended temperature) option, can operate in environments with less controlled temperatures. This feature eliminates the need for an expensive climate-controlled room, allowing for precise and reliable measurements close to the production line.
Wireless PULSE
PULSE offers real-time environmental monitoring for metrology through a network of sensors. It alerts users to changes in temperature, humidity, vibration, air pressure, and luminosity that could affect measurement accuracy, helping to ensure the integrity of data. As a result, PULSE is ideal for automated inspection setups, ensuring that high-volume measurements are conducted under optimal conditions.
Eco Mode Plus
Eco Mode Plus is designed to save money, energy, and air. After a period of machine inactivity, this feature automatically shuts off the compressed air flow to the air bearings. During normal operation, it can save up to 25% on compressed air costs and reduce compressed air usage by up to 90% when the CMM is idle. Additionally, the energy-saving Eco Mode feature is automatically activated when Eco Mode Plus is in use.
Features and Benefits
- Global Coordinate Measuring Machines (CMMs) are designed using advanced concepts that prioritize assurance and clarity. They aim for long-term stability, reduced measurement uncertainty, adaptability to challenging conditions, quick point capture, and an improved user experience by integrating high-quality components with state-of-the-art technologies.
- Manufacturers can maximize the benefits of these metrology solutions throughout their entire lifecycle.
- The robust mechanical design features a strong granite foundation with an integrated dovetail guide, ensuring consistent accuracy across the measuring volume and long-term system stability.
- Additionally, the triangular crossbeam bridge design offers a superior stiffness-to-mass ratio compared to square or rectangular traverses, enabling maximum dynamics and high-speed measurements.
- All axes have preloaded air bearings.
Contactless, low-friction and low-wear axis motion ensures fast and repeatable positioning at all speeds and accelerations, resulting in low measuring uncertainties. - Belt drive system that requires less upkeep
Flat and V-ribbed belts ensure smooth and low-vibration axis motion. - Compensation for temperature
Reliable measurement findings are ensured by using temperature monitoring at the scales and on the workpiece to compensate for thermally generated measurement discrepancies in real-time. - Increased operating temperature range (option)
Measure your components more resistant to the effects of the environment. Without requiring an expensive climate chamber, the CMM can function closer to the manufacturing line thanks to its wider temperature operating range (15–30°C).
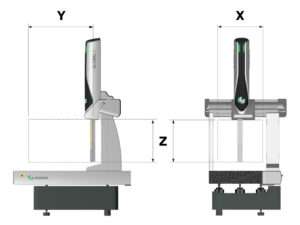
Measuring volume

| Type | X (Width) | Y (Depth) | Z (Height) |
| 5.5.5 | 500 mm | 500 mm | 500 mm |
| 5.7.5 | 500 mm | 700 mm | 500 mm |
| 7.7.5 | 700 mm | 700 mm | 500 mm |
| 7.10.7 | 700 mm | 1000 mm | 700 mm |
| 9.12.8 | 900 mm | 1200 mm | 800 mm |
| 9.15.8 | 900 mm | 1500 mm | 800 mm |
| 9.20.8 | 900 mm | 2000 mm | 800 mm |
| 12.15.10 | 1200 mm | 1500 mm | 1000 mm |
| 12.22.10 | 1200 mm | 2200 mm | 1000 mm |
| 12.30.10 | 1200 mm | 3000 mm | 1000 mm |
