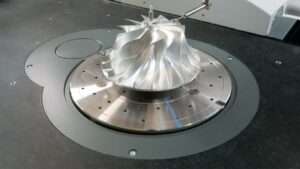
Coordinate measurement can be limited when examining components that require several probe adjustments, especially intricate and tiny internal gearing. A rotary table can be used to measure these components, as well as crankshafts, camshafts, screw compressors, turbine disks, and blisks, in a relatively simple and confident manner. There are multiple CMM models that can utilize these rotating tables.
For CMM applications, precision rotary tables with mechanical bearings and an accuracy of ± 1 arc second are suitable. The tabletop and base are made of stabilized cast iron with T holes in the platen top, and they are expertly machined or honed. Premium precision bearings function in a lightly loaded state and are designed to completely eliminate movement in both radial and axial directions.
Tables are available in the following sizes :
- Ø 300 mm
- Ø 400 mm
- Ø 500 mm
- Ø 600 mm
- Ø 700 mm
- Ø 1000 mm
- Ø 1200 mm
