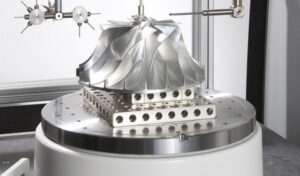
Coordinate measurement methods often encounter difficulties when examining components that require several probe adjustments, such as intricate and tiny internal gearing. A rotary table can be used to measure these components, as well as crankshafts, camshafts, screw compressors, turbine disks, and blisks, in a relatively simple and confident manner.
Leitz offers a range of rotary table models to suit your requirements:
– Leitz oRT 2, 4, and 6: On Top variants measuring 200 mm, 400 mm, and 600 mm in diameter
– Leitz iRT 2, 4, and 6: These models feature no reduction in the Z measuring range and are integrated into the Leitz PMM-C, Leitz Reference HP/Xi, and Leitz PMM-F work table.

Features & Benefits
- All four sides allow access to the workpiece.
- Efficiency can be improved by inspecting prismatic and rotationally symmetric pieces with fewer probe adjustments.
- The workpieces can be measured at any angle thanks to the rotary table’s unlimited positioning capabilities.
- The decoupled drive ensures precision by not generating heat energy.
- The use of a rotary table for pallet measurement is optional.
